
How to create beautiful mockups of your art
- amberhendersonart
- Jul 13, 2022
- 4 min read
BUT AMBER, WHY SHOULD I EVEN USE MOCKUPS?
Mockups are an amazing tool for artists! They let you present your artwork to potential buyers so they can visualize how the artwork would look in their home. They also are a HUGE time saver! While you can always purchase mockups or use the various mockup apps out there, creating your own will save you money and allow you to create unique images for your feed or your website so you can stand out from the crowd!

1. PHOTOGRAPH YOUR FRAME:
Hang your frame on the wall or place it on your shelf and snap a pic!
Make sure you take the glass out of the frame to prevent glare. Use a neutral image or a blank sheet of paper in place of your painting to prevent color reflection on the mat or frame, which can make your mockup look fake.

When taking the photo, try and leave more room than you need around the frame to allow for both vertical and horizontal cropping.
Now head to your favorite photo editing app and adjust the image to your liking!
2. PHOTOGRAPH OR SCAN YOUR PAINTING

If you are photographing your work, lay your painting flat and in good, natural lighting. Leave a bit of the background showing to ensure you capture the entire painting.
Next, head to your favorite editing app and edit the photo to match your painting as closely as possible. *HINT* Edit your photos in natural lighting with the painting next to you for the best results!
3. CONVERT THE IMAGE OF YOUR FRAME INTO A MOCKUP
Import your image into your illustrator tool of choice. I use procreate for this step, but any digital illustration tool will work!

Now select the placeholder image. It helps to select an area just slightly larger than the placeholder while still keeping the slivers of shadow and highlight on the mat.
I like the use the freehand tool on Procreate and simply click on each corner to create a nice clean box exactly the dimensions of my placeholder.
If your frame has a mat, then you're done! Cut out the placeholder and save your new frame mockup as a .png to maintain the transparency.
If your frame does not have a mat, you'll need to do some additional work to make your frame look realistic.
Creating a frame mockup without a mat:


If your photo does not have a mat, you’ll need to add in a shadow. First, select a cool, dark gray.
Draw in your shadows on a new layer beneath the frame.
Pay attention to how the shadows look in the original photo and try to replicate that as best as you can.
To make your shadow look more natural, we’re going to use Gaussian blur. Adjust the blur so that the shadows are still dark but the edges are soft.
Next, adjust the opacity of the shadow layer. This will take a bit of trial and error to achieve the look you want so try a few different opacities and see what works!
Finally, set the background to transparent and save the image as a .png
4. CREATE A TIMESAVING TEMPLATE USING YOUR MOCKUP
Now you have an image that you can use over and over again across social media, your website, your Etsy, or anywhere else!
I use Canva for all my mockups - I’ve created a ready-to-use template that you can use to get started! Just click here to download and use the template.
Also, click here to download the mockups! I’ve included square and rectangular ready-made mockups of the gold frame for you. Go to "Uploads" on the left side of the screen and click "Upload media" to import the mockups to Canva.

Start by adding in a “grid”. The template already has these set up so skip this step if you are using that!
Take your frame image and drop it into the grid.

Add a second grid and adjust the size to fit the frame opening. Again, the template has already set this up!
Add your painting image into the second grid.
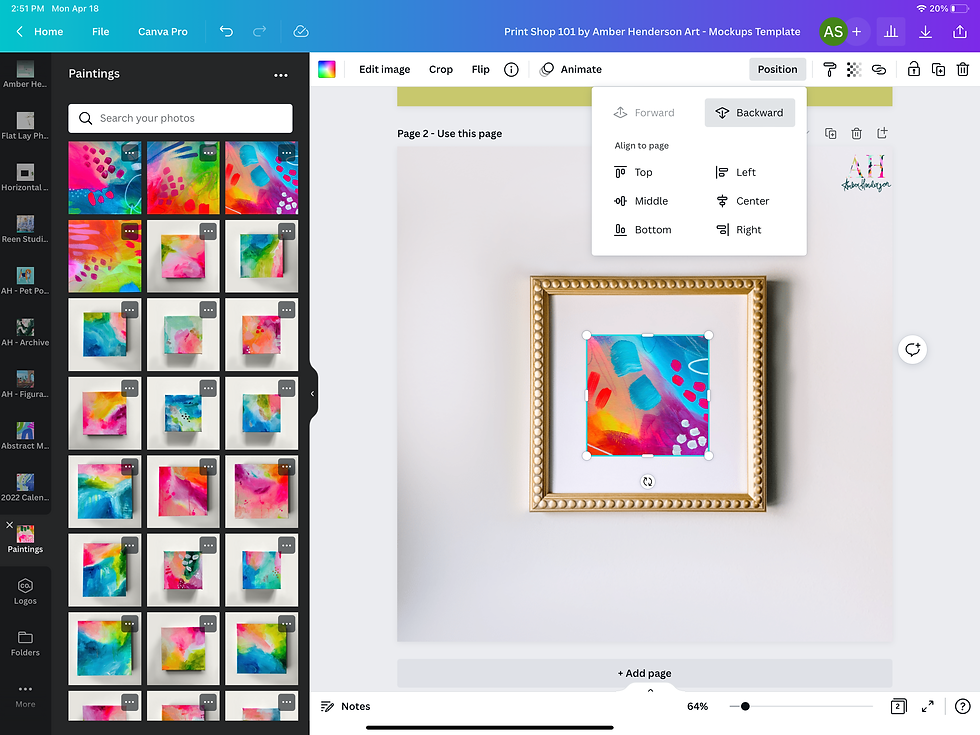
Move your painting image to the back by clicking on "Position" and then "Backward."
If this is for a website or Etsy listing, add your logo in.
Now you copy this page for as many paintings that you need to create mockups for!
Click on the "Duplicate Page" icon on the top right of the page next to the trash can.
Bring the painting grid back to the front, drag and drop your next painting into the grid, and send it to the back again!
Download your image by clicking on "Share" in the top right of your screen and then "Download." Select the pages and image type and download!
Use these steps to create all kinds of images for your storefront or Instagram!

Using Canva to have ready-to-go templates for Instagram and website listing image has been a game-changer for me. I hope it saves you plenty of time so that you can get back to creating beautiful art!
I am always available for questions via email or on Instagram (@AmberHenderson_Art)! Feel free to tag me so I can see your amazing mockups!

Comments